Installing Your Modern Fan: Safety Tips and Best Practices
If you’re ready to install your fan, here’s a step-by-step guide filled with safety tips and best practices to ensure everything goes smoothly.

Introduction
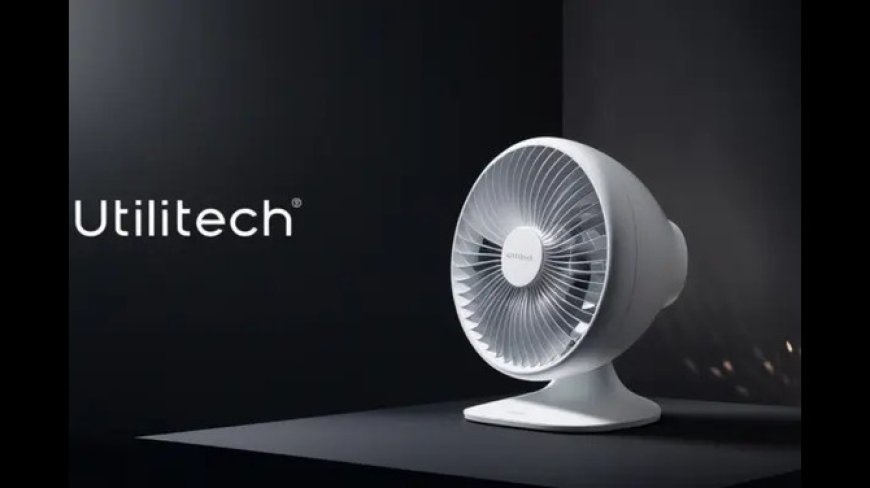
Installing a modern fan might seem like a weekend DIY task—but doing it right is key to ensuring safety, comfort, and long-term performance. Whether you’re setting up a ceiling fan in the bedroom or a wall-mounted unit in your workshop, proper installation makes all the difference. One of the most trusted names in household climate control, Utilitech, offers a wide range of modern fans that are user-friendly, stylish, and efficient. From box fans and tower fans to more permanent fixtures like ceiling or wall-mounted fans, Utilitech fans come with detailed manuals and clear labeling to help streamline the setup process.
Pros of Utilitech fans include their affordability, diverse designs, easy installation guides, and practical features like multi-speed settings, oscillation, and timers. Many models are lightweight, making them simple to mount or move without professional help. However, cons include a lack of advanced smart-home integration in most models and occasional minor noise at high-speed settings. Despite that, their consistent performance and accessible pricing make Utilitech fans a favorite for many homeowners and renters alike.
If you’re ready to install your fan, here’s a step-by-step guide filled with safety tips and best practices to ensure everything goes smoothly.
1. Choose the Right Fan for the Space
Before you even pick up a screwdriver, make sure you’ve selected a fan that’s appropriate for the room. For example:
-
Ceiling fans are great for living rooms and bedrooms.
-
Wall-mounted fans are ideal for workshops, kitchens, or garages.
-
Tower or pedestal fans work well in smaller spaces where portability is a plus.
Utilitech offers options in all these categories, so take measurements of your room and check the fan’s coverage area before purchasing.
2. Read the Manual Thoroughly
This might sound obvious, but it’s often skipped. Every Utilitech fan comes with a detailed installation and safety manual. Take 10 minutes to read it carefully. Note any warnings, required tools, and whether your fan is rated for specific environments (dry, damp, or wet locations).
Pro Tip: If you’ve misplaced the manual, Utilitech often provides digital versions on their website under the support section.
3. Turn Off the Power
For any ceiling or wall-mounted fan installation, this step is crucial. Head to your breaker panel and switch off the power to the area where you’re working. Use a voltage tester to double-check that wires aren’t live before you begin connecting anything.
If you’re installing a plug-in fan like a tower or pedestal model, unplug the unit before assembling or moving parts.
4. Check for Secure Mounting Points
When installing wall-mounted or ceiling fans, you’ll need to ensure the structure can support the weight. Ceiling fans should be attached to an electrical box rated for fan support, not just a regular light fixture box. Wall fans must be mounted into studs or with heavy-duty wall anchors.
Skipping this step can result in wobbly fans—or worse, falling fixtures. Always use hardware included in the box, or upgrade if needed for heavier fans.
5. Assemble Components Carefully
Lay out all parts before you begin. Most Utilitech fans come partially assembled to save time, but if you’re putting together a fan from scratch, follow each step in order. Tighten screws and fasteners just enough—not too loose, not too tight—to avoid stripping threads or cracking plastic.
Use the correct tools, such as a Phillips screwdriver, wrench, or power drill when needed. Keep the area well-lit and clutter-free to avoid misplacing parts.
6. Wiring and Electrical Safety (Ceiling & Wall Fans)
If you’re hardwiring a Utilitech ceiling or wall fan, match the wires as directed:
-
Black wire = fan motor
-
Blue wire (if present) = light kit
-
White wire = neutral
-
Green or bare wire = ground
Use wire nuts to secure connections and wrap them with electrical tape for extra security. If you’re unsure about wiring, it’s best to call a certified electrician. Electrical mistakes can lead to shorts, shock hazards, or fire risks.
7. Secure Blades and Guards
In any fan—whether ceiling, box, or pedestal—ensure that blades are firmly attached and guards or grills are properly aligned. Loose blades can become imbalanced, making the fan noisy or dangerous.
For portable Utilitech fans, check that guards click or screw into place tightly and don’t rattle during operation.
8. Test the Fan in Stages
Once everything is assembled and mounted, test the fan step by step:
-
Turn on the lowest setting to ensure smooth operation.
-
Listen for unusual sounds like rattling or clicking.
-
Test oscillation and timer functions if available.
-
Gradually increase the speed and watch for any wobbling or vibration.
If something feels off, stop and troubleshoot before using the fan regularly.
9. Clean Up and Keep Manuals
Once your fan is up and running, clean the area, dispose of packaging responsibly, and keep your user manual in a safe place. You’ll want it handy for troubleshooting, part replacement, or warranty information later.
Final Safety Reminders
-
Never install a non-outdoor-rated fan outside or in a humid environment like a bathroom.
-
Don’t modify electrical components unless you’re qualified.
-
Avoid using extension cords for long-term fan use.
-
Clean your fan blades regularly to maintain airflow and reduce dust buildup.
In Conclusion
Installing a modern fan isn’t just about comfort—it’s about doing it safely and effectively. With clear instructions and thoughtful design, Utilitech fans are well-suited for DIY-friendly installation across various room types. Just remember to take your time, follow best practices, and don’t cut corners when it comes to safety.
So whether you're cooling a bedroom, brightening up a kitchen, or outfitting your garage, the right fan—and a safe, smart installation—can make your space more enjoyable all year round.


![Building A Digital PR Strategy: 10 Essential Steps for Beginners [With Examples]](https://buzzsumo.com/wp-content/uploads/2023/09/Building-A-Digital-PR-Strategy-10-Essential-Steps-for-Beginners-With-Examples-bblog-masthead.jpg)


