


![https //g.co/recover for help [1-866-719-1006]](https://newsquo.com/uploads/images/202506/image_430x256_684949454da3e.jpg)


![How Smart PMs Scale Their Careers in Any Org [TPG Live Recap]](https://tpgblog.com/wp-content/uploads/2025/06/2025-06-12-thumbnail-action.png?#)


DIY Hardwood Installation: When to Tackle It and When to Call a Pro in America
Discover when DIY hardwood flooring is right for your American home. Learn pros, cons, tools, and expert tips to achieve flawless flooring or know when to call a professional.
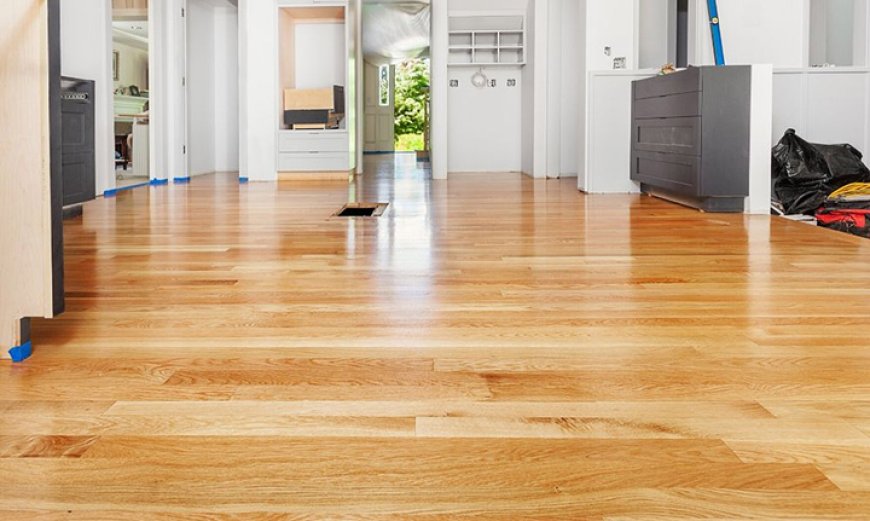
Installing hardwood flooring yourself can be a rewarding project, offering significant cost savings and the satisfaction of a job well done. However, hardwood installation is a precise and labor-intensive process that requires the right tools, skills, and patience. For many American homeowners, understanding when to take on a DIY approach versus hiring a professional contractor is essential to ensure a flawless, long-lasting floor.
This comprehensive guide will help you evaluate your hardwood installation project, understand the pros and cons of DIY versus professional help, and provide expert tips for success.
Benefits of DIY Hardwood Installation
-
Cost Savings: Avoid labor fees and potentially reduce material costs by handling the project yourself.
-
Flexibility: Set your own schedule without coordinating with contractors.
-
Skill Development: Gain valuable home improvement skills that can be used on future projects.
-
Personal Satisfaction: Enjoy pride in transforming your home with your own hands.
Challenges and Considerations for DIY Installation
-
Time-Consuming: Hardwood installation can take days or weeks depending on the area and experience level.
-
Requires Precision: Mistakes can cause costly damage, uneven floors, squeaks, and reduced floor longevity.
-
Tools and Equipment: Proper tools such as nailers, saws, moisture meters, and spacers are required.
-
Physical Demands: The work involves heavy lifting, kneeling, and detailed craftsmanship.
-
Subfloor Preparation: Ensuring a level, clean, and moisture-appropriate subfloor is crucial and can be complex.
When to Consider a DIY Hardwood Installation
-
You have moderate to advanced DIY experience, especially with carpentry or flooring.
-
The installation area is relatively small or straightforward (e.g., single room without complex layouts).
-
Your hardwood flooring is engineered or click-lock style designed for floating installations, which are generally easier for DIY.
-
You have access to the proper tools or are willing to rent or purchase them.
-
You have ample time and patience to dedicate to the project without rushing.
When to Hire a Professional Hardwood Installer
-
Large or complex installation areas involving multiple rooms or irregular shapes.
-
Installation over challenging subfloors such as concrete slabs or uneven surfaces requiring extensive prep.
-
Solid hardwood floors requiring nail-down installation, which involves technical skill and equipment.
-
Custom design layouts like herringbone, parquet, or borders.
-
If you are unfamiliar with moisture testing, acclimation, and expansion gap requirements critical for US climates.
-
When time constraints demand quick, expert completion.
Steps for a Successful DIY Hardwood Installation
-
Choose the Right Flooring: Pick engineered hardwood for easier DIY installs, or consult pros for solid hardwood.
-
Acclimate the Flooring: Let wood acclimate to your home’s climate for 3–7 days.
-
Prepare the Subfloor: Ensure it’s clean, level, and dry—this step is non-negotiable for durability.
-
Gather Tools: Essential tools include a flooring nailer or stapler, saws, tape measure, chalk line, spacers, hammer, and safety gear.
-
Plan Layout: Measure carefully, plan plank direction, and decide on starting point.
-
Install Moisture Barrier (if required): For concrete or damp subfloors.
-
Install Flooring: Follow manufacturer instructions closely for installation method (floating, nail-down, glue-down).
-
Leave Expansion Gaps: Crucial for wood movement due to humidity changes.
-
Finish and Clean: Sand and finish if unfinished hardwood, or clean and inspect finished floors.
Pro Tips for DIY Flooring Success in US Homes
-
Watch detailed tutorial videos or attend workshops.
-
Rent professional tools for better results.
-
Work with a helper—installation is faster and safer with two people.
-
Double-check moisture levels before starting.
-
Take your time to ensure precise cuts and secure fastening.
-
Maintain consistent expansion gaps along walls and around obstacles.
Frequently Asked Questions
Q1: Can I install hardwood flooring myself if I have no prior experience?
A: While possible with engineered click-lock flooring and patience, prior experience or willingness to learn is highly recommended to avoid costly mistakes.
Q2: How much can I save by doing a DIY hardwood floor installation?
A: Savings vary, but labor typically accounts for 30–50% of total flooring costs, so DIY can save significant money if done properly.
Q3: What tools do I need for a DIY hardwood floor install?
A: Essential tools include a flooring nailer or stapler, saws, tape measure, chalk line, spacers, hammer, pry bar, and safety gear.
Q4: How long does it take to install hardwood flooring yourself?
A: For a standard room, expect several days to a week depending on skill level and prep work required.


